DIY: Gold Leaf Cutting Board

Over the last few years I've watched myself slowly transition into a new way of thinking about things, and from that a new way of buying things. Now, I'm not a minimalist by any means; though I do envy those who can maintain that clutter-free self discipline. Instead I've become committed to the idea of bringing into my home fewer, better things. So when I find a piece that can serve two purposes in my home and life I get pretty excited!
That's exactly how I feel about my latest project. It's a functional cutting board that is beautiful enough to go straight to the table. This piece transitions seamlessly from a useful kitchen item to a beautiful serving board, making entertaining a breeze. The natural unfinished wood paired with the distressed gold leaf creates a look of effortless elegance that is the perfect aesthetic for summer dinner parties. The fact that this project takes less than 30 minutes and costs less than $20 for a custom serving piece, well, that's just awesome on top of awesome.
To get started you'll need a cutting board with a fairly thick width-- the thicker the board the more gold glamour, so keep that in mind when selecting your surface. I used this $6 chopping board from Ikea. This smaller cheeseboard size would be adorable too! You'll also need gold leaf sheets, gold leaf adhesive, and gold leaf sealer. I found all three at my local Michael's craft store, but they can also be ordered online as a set here.
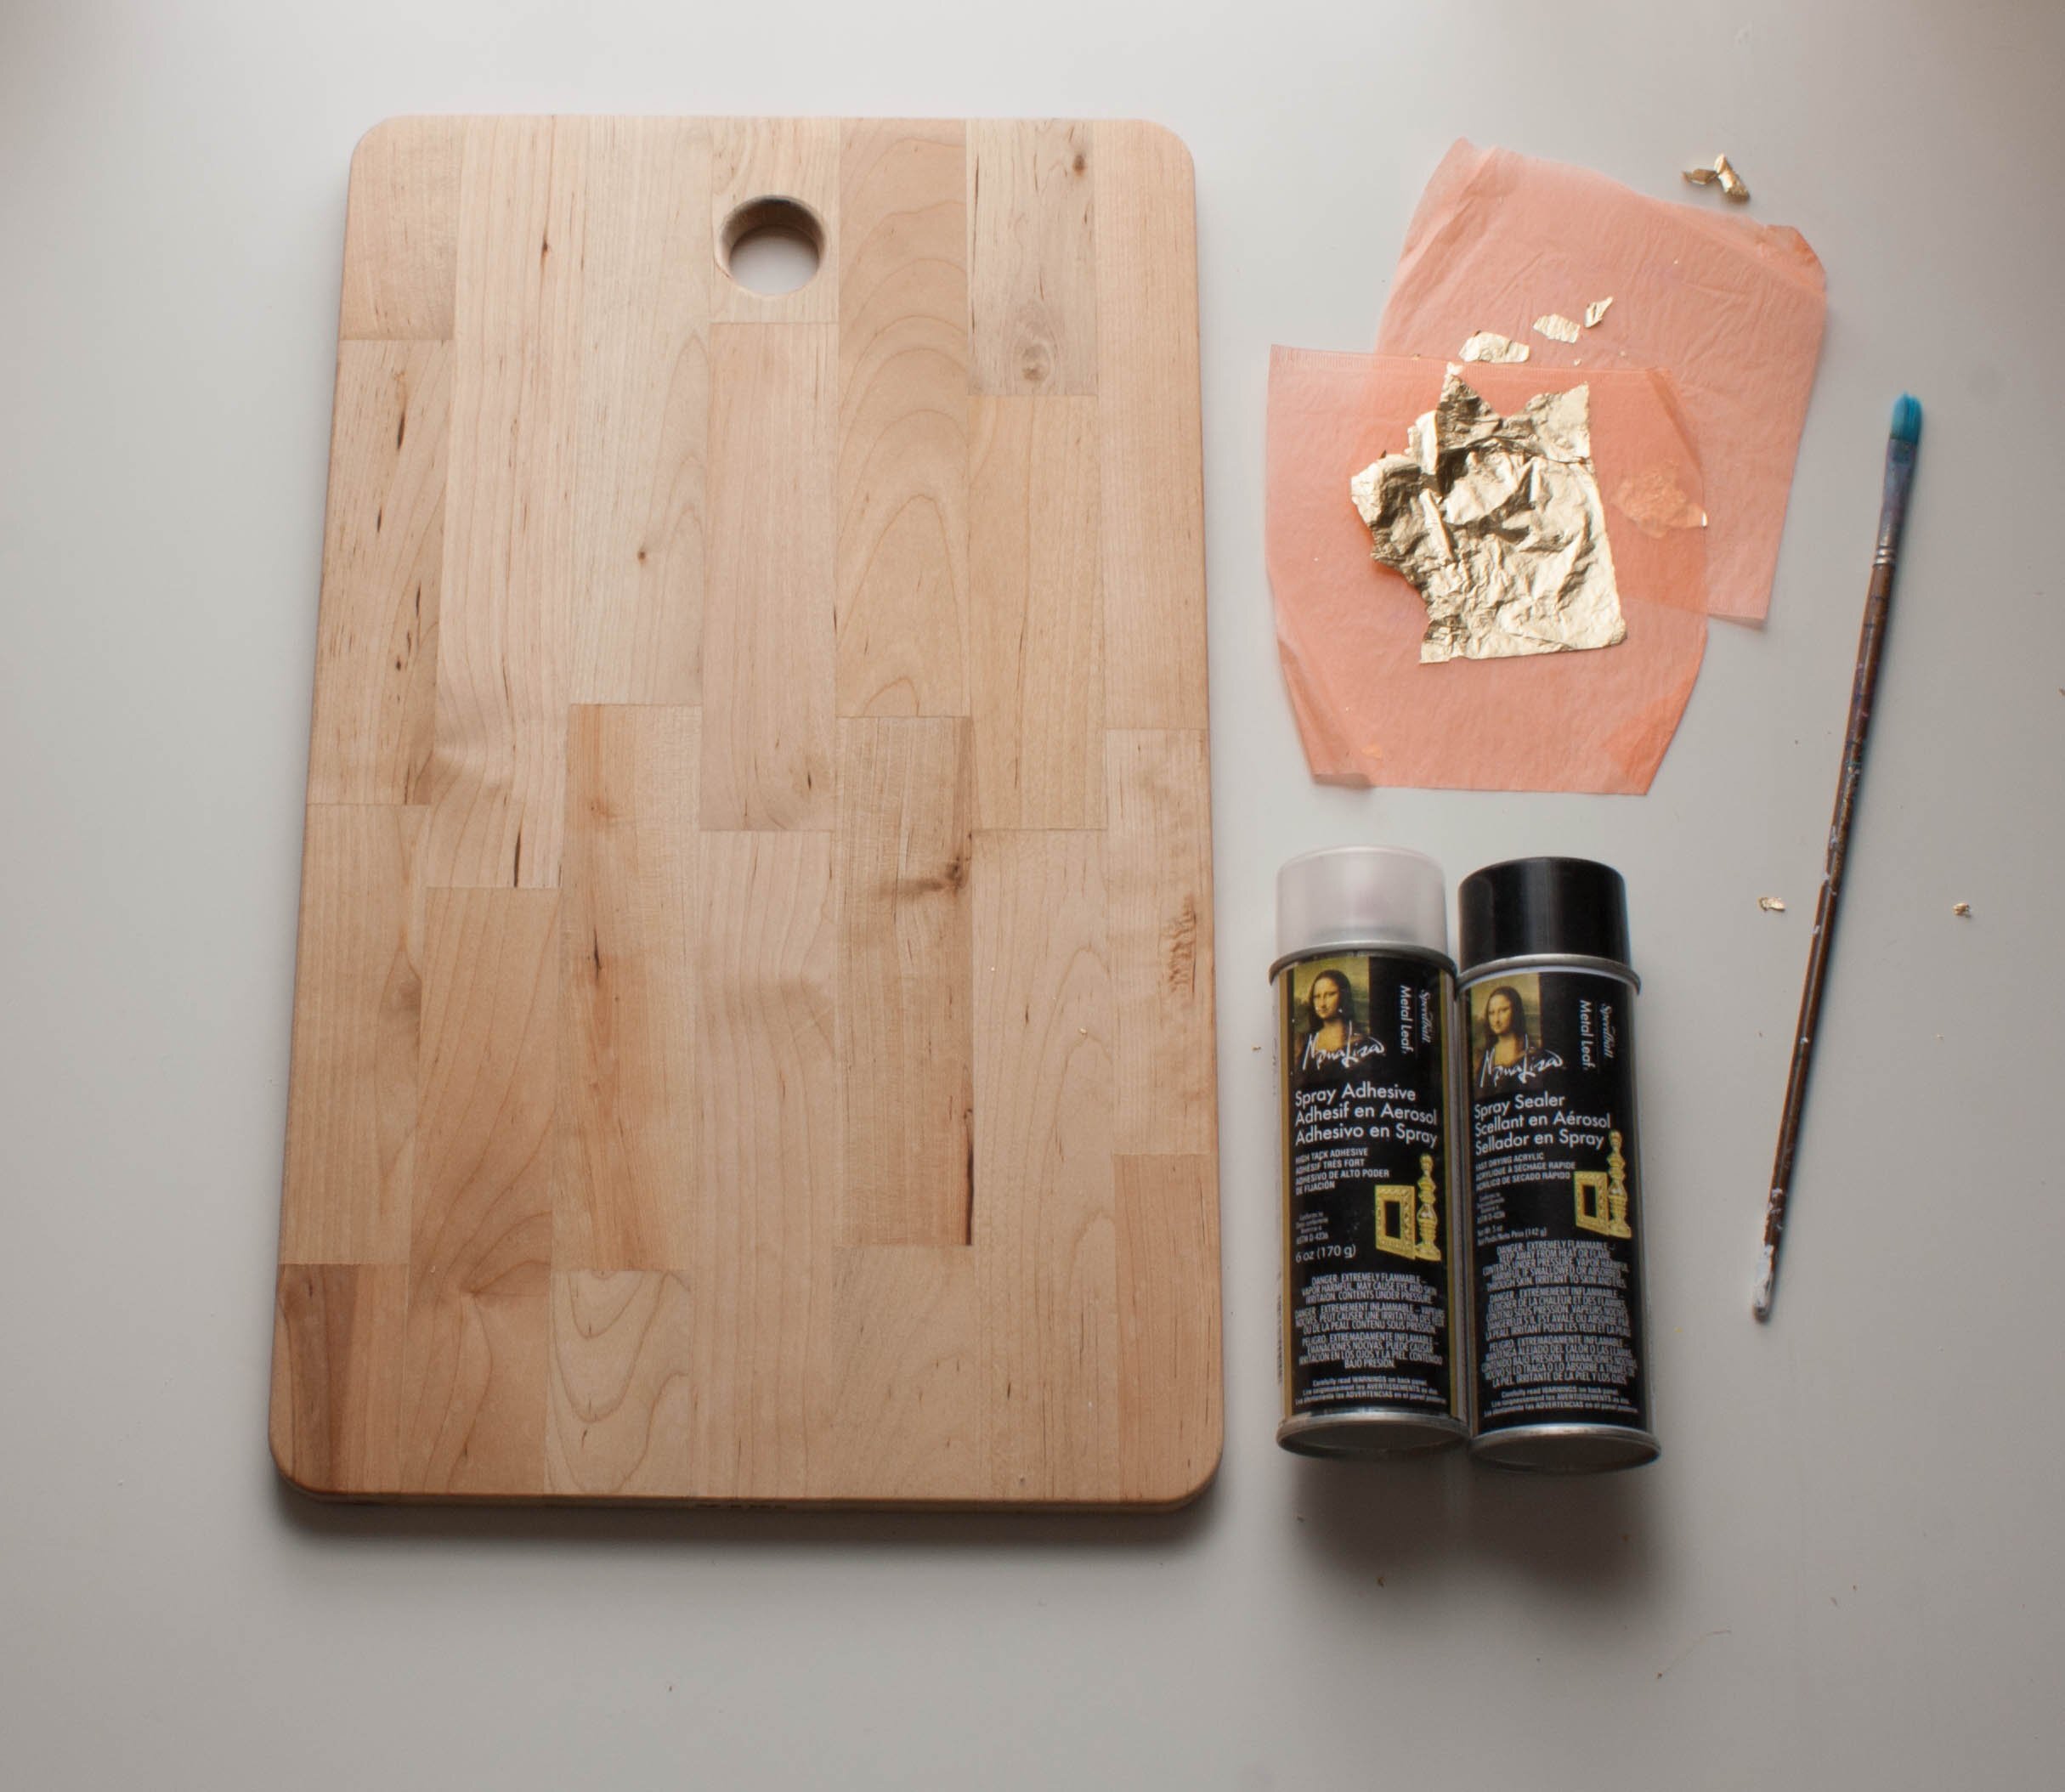
Materials:
cutting board
gold leaf sheets
gold leaf adhesive
gold leaf sealer
2 paintbrushes (one disposable)
small disposable bowl
painter's tape
Directions:
1) If using an adhesive spray, carefully spray adhesive into the disposable bowl. If using a bottle of adhesive, simply paint from the jar.
2) Using your disposable paint brush paint the adhesive onto one side of the board.
3) Use the tissue paper inserts between the gold leaf sheets to pick up a sheet of leaf and press the leaf onto the adhesive covered edge. (The gold leaf will stick to your fingers, so you'll want to use the tissue paper sheets to pick up and apply the leaf.) The gold sticks to the adhesive easily. Pull the rest of the sheet gently away from the board. It will tear where it isn't adhered, and that's just fine. Continue the process of pressing the leaf to the board and pulling away the excess until you've covered the entire side.

4) Begin at step one and repeat through step three, covering one side of the board at a time.
5) Once the board's sides are all loosely covered with the leaf take your second brush (it's important this brush is clean and dry) and gently press and brush along the gold leaf, dusting away any loose pieces as you go. This will smooth out any wrinkles and remove any flaking pieces.

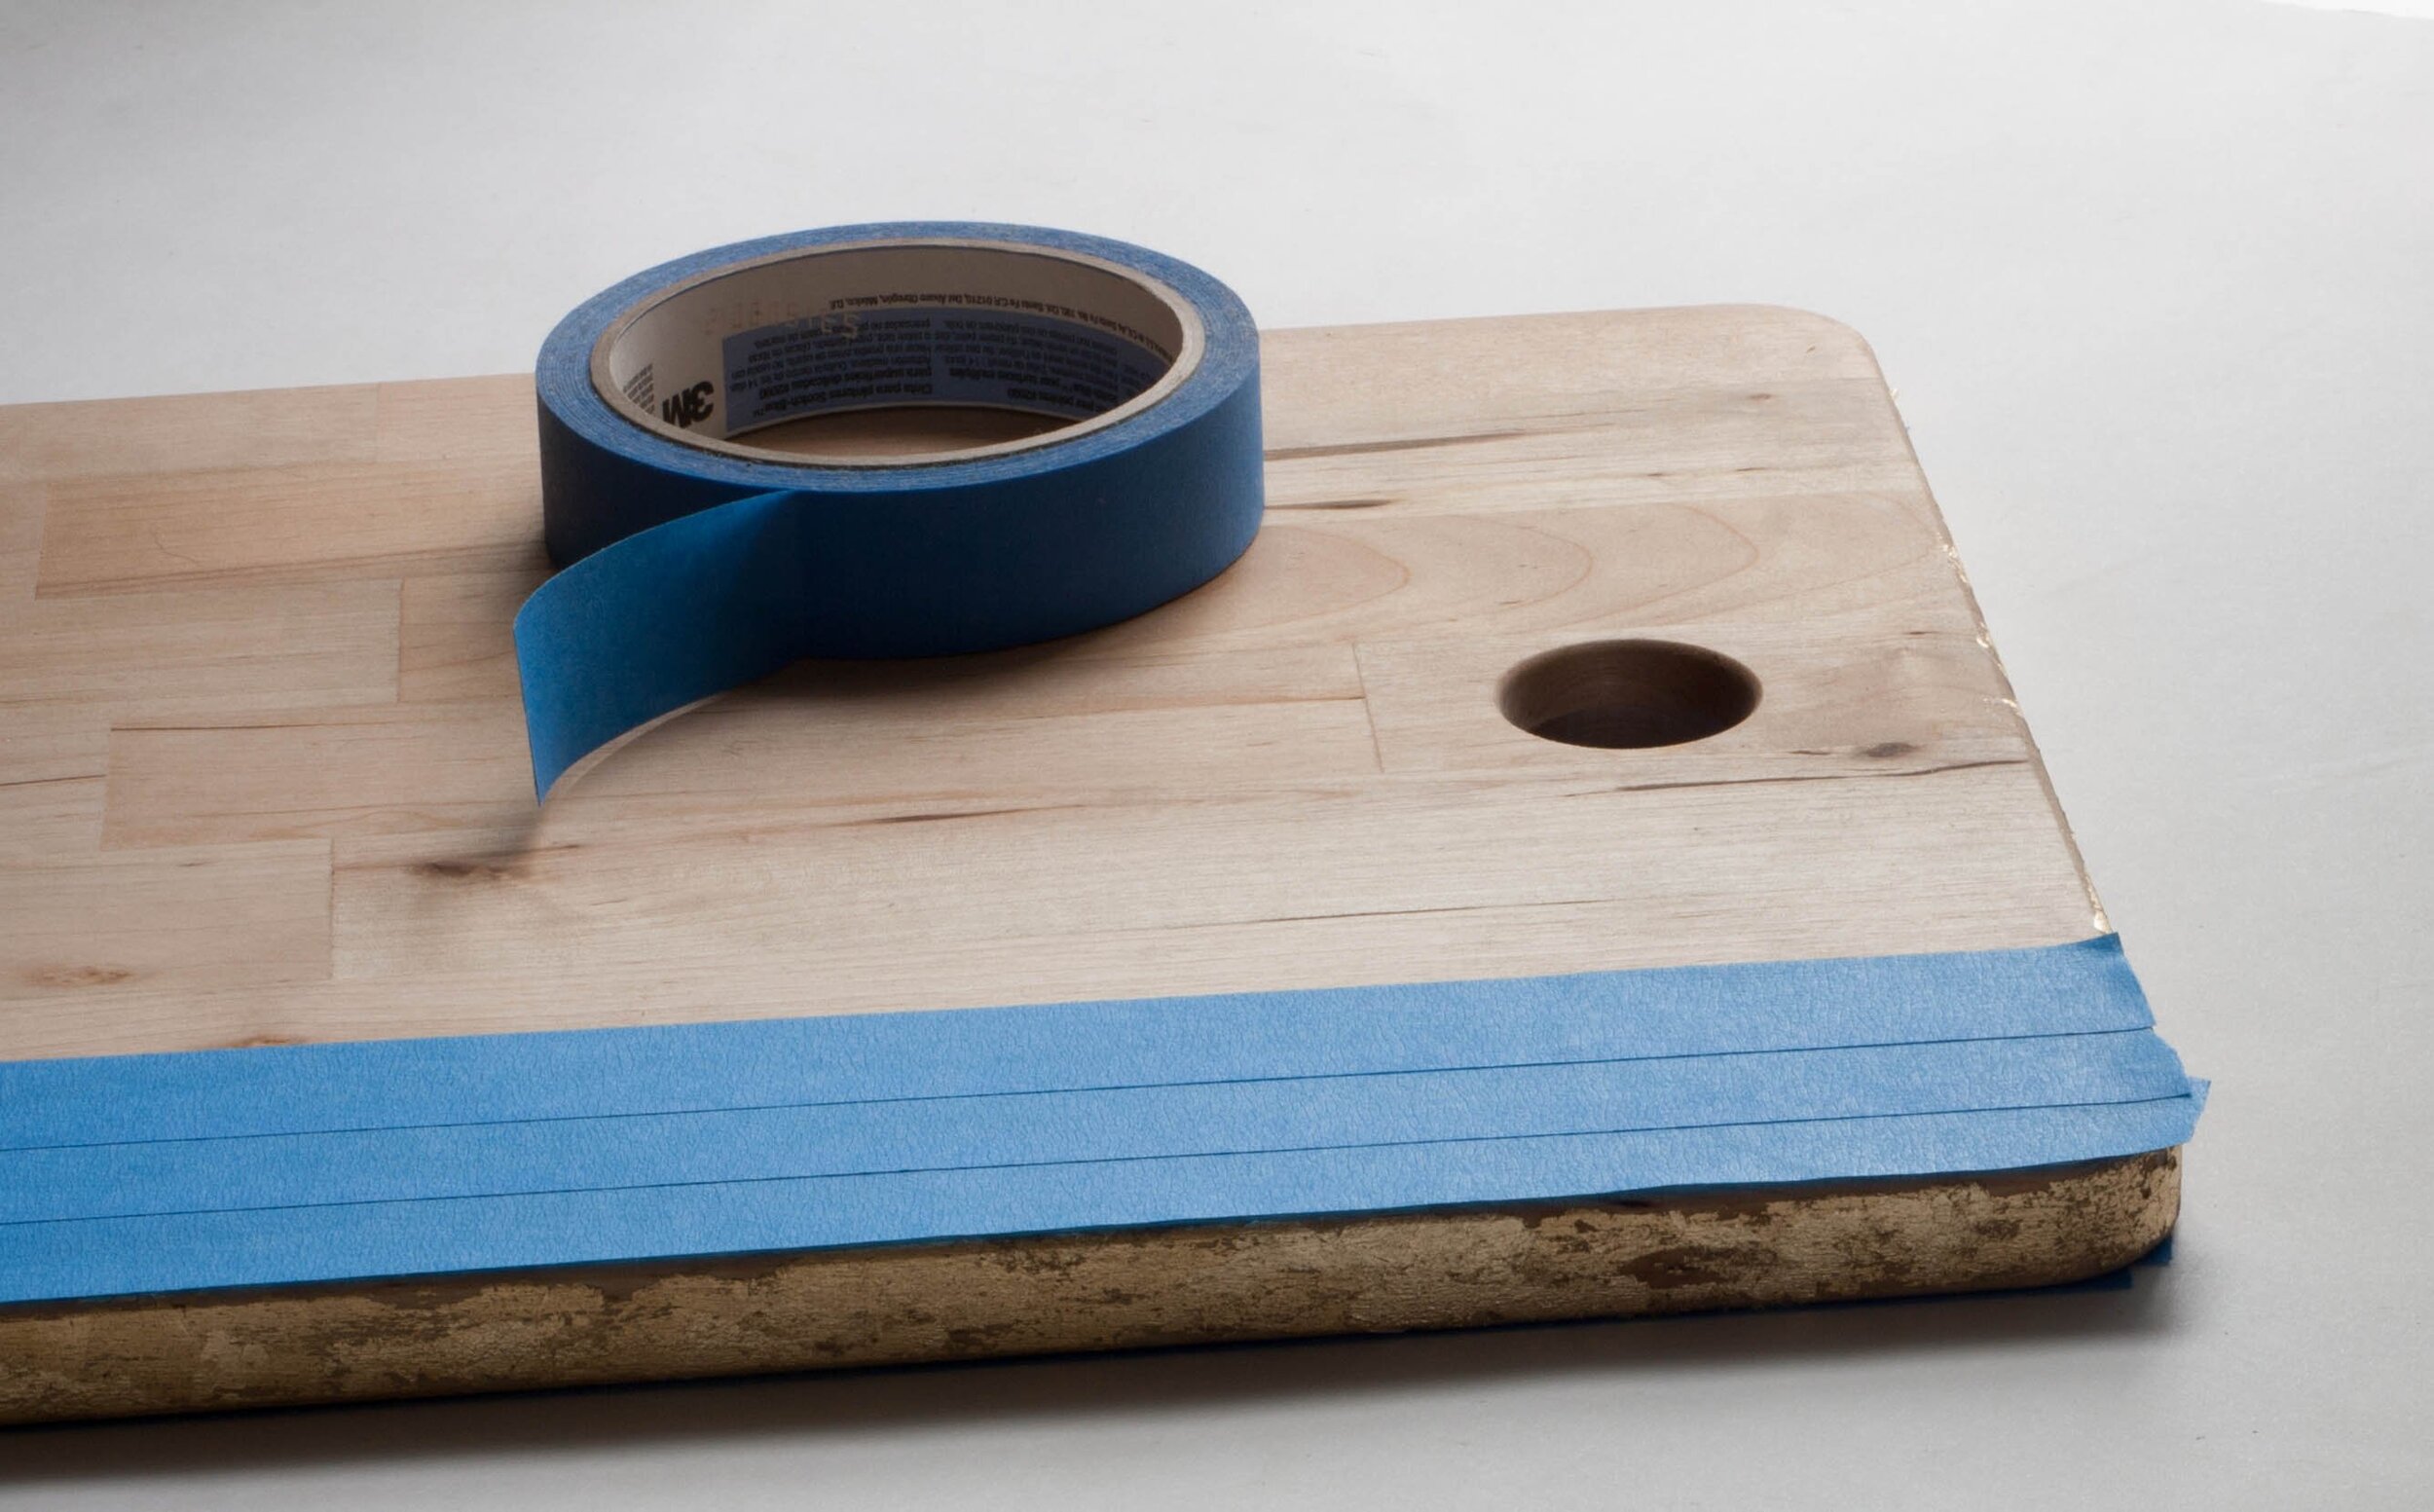
6) Allow the board to dry for a few minutes. Tear strips of painter's tape to cover the top and bottom of the board. This is the area that will come into contact with food, so be sure to carefully cover the entire surface with tape to protect the surface from the sealant which you will spray or paint over the gold leaf next.
7) Spray or paint on the sealer, following the package's directions. Allow to dry. Once dry remove the tape. Your board is now ready to serve!

**To care for your gold leaf board wash gently with a mild detergent, avoid soaking, and allow to dry thoroughly between uses.