DIY: Gold Leaf Splatter Pumpkins
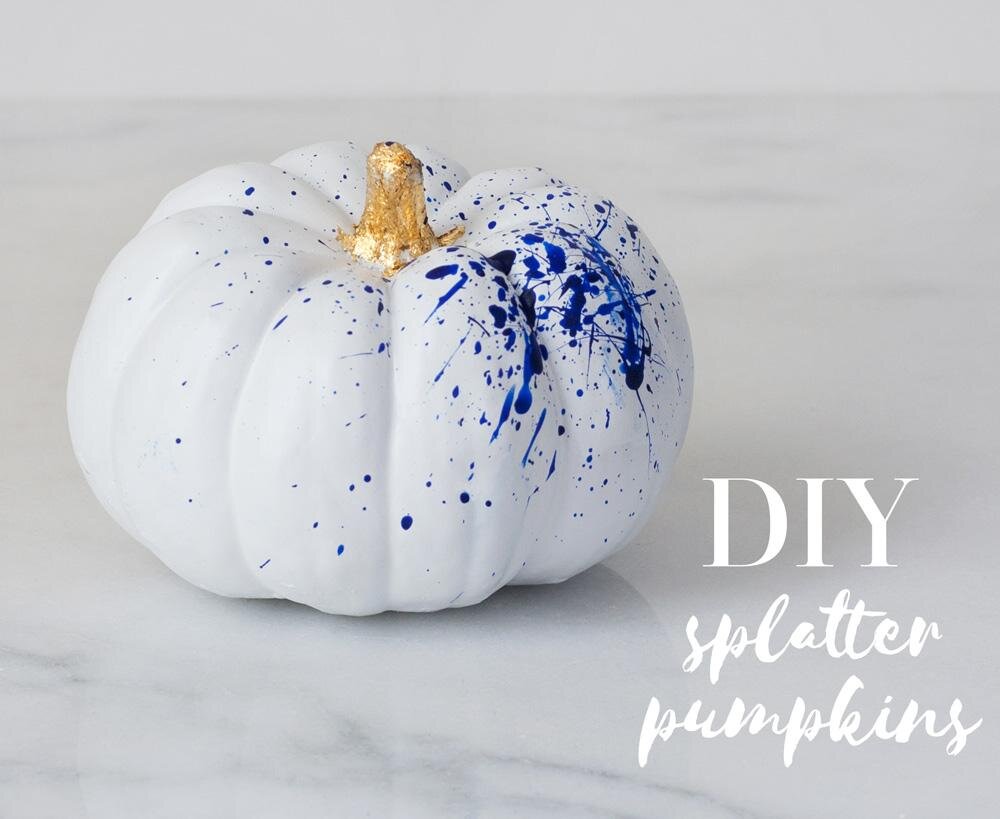
I decided a few weeks ago that I wanted to do a simple yet totally chic DIY pumpkin post for Halloween. I'm not a huge fan of orange, so I knew that a traditional orange, black, green, and brown color scheme was out. Totally out. I wanted to approach pumpkin decorating the same way I've been approaching my porcelain lately. If you take a peek in the Suite One Studio shop right now it will probably come as no surprise that I'm loving ivory white backgrounds covered with splatters, brushstrokes, and drips in cool cobalt, all finished off with metallic gold detailing. I decided this was exactly how I would decorate my pumpkins! This is a super easy DIY project that takes less than 30 minutes of active work. There's a little waiting for the spray paint to dry, but it's a great fast project that can be completed in an afternoon, and the kids can even help!
What You'll Need:
Pumpkins
White Satin Spray Paint
Blue Acrylic Paint
Gold Leaf
Gold Leaf Adhesive
3 Paintbrushes (one disposable for gold leaf adhesive)
Newspaper (or drop cloth)
1 small bowl

Wipe the pumpkins free of any dirt with a barely damp cloth. Bring pumpkins outside and place on newspaper or other surface that you don't care about. Spray painting can be messy business so be sure you're not wearing your favorite clothes, or working on your favorite patio table.

Follow the instructions on the spray paint can to evenly coat your pumpkins. I think they're kinda lovely at this point and will definitely be making some simple satin white ones like this to mix in with my more glamorous gold leaf splatter pumpkins. Scattered on a tabletop together this would be a really impactful display for a fall dinner party!

Once the spray paint is dry you're ready to apply the gold leaf. Most gold leaf adhesive is sold in a spray can form, making it tough to coat small, specific spaces with the glue. I simply spray a little into the can's cap and dip my paintbrush into it. Paint the adhesive onto the stem of the pumpkin. Follow the instructions on your gold leaf package if needed to apply the sheets onto the adhesive. The sheets stick to each other and your hands so work quickly and purposefully to avoid frustration. (And yes, this is coming from experience!) After the leaf is secured (wait at least 5 minutes) use a different paint brush to gently press the gold leaf, smooth out any bumps or wrinkles, and wipe away any loose pieces.

Next you're ready for the splatter stage which is really, really messy (read: I had paint on my face, in my hair, on my clothes...), so be sure you work with this in mind. The more room you have to splatter and fling paint in a carefree manner the more fun this will be! Working outside is highly recommended.

Add the acrylic paint to a bowl. Using your third clean paintbrush dip your brush into the paint to fully load the bristles. Hold your brush above the pumpkins and flick the brush! You can change the amount of paint on your brush to create bigger or smaller splatters. You can also change the angle or height of your brush to create splatters in different directions until you've created your perfect pumpkin!
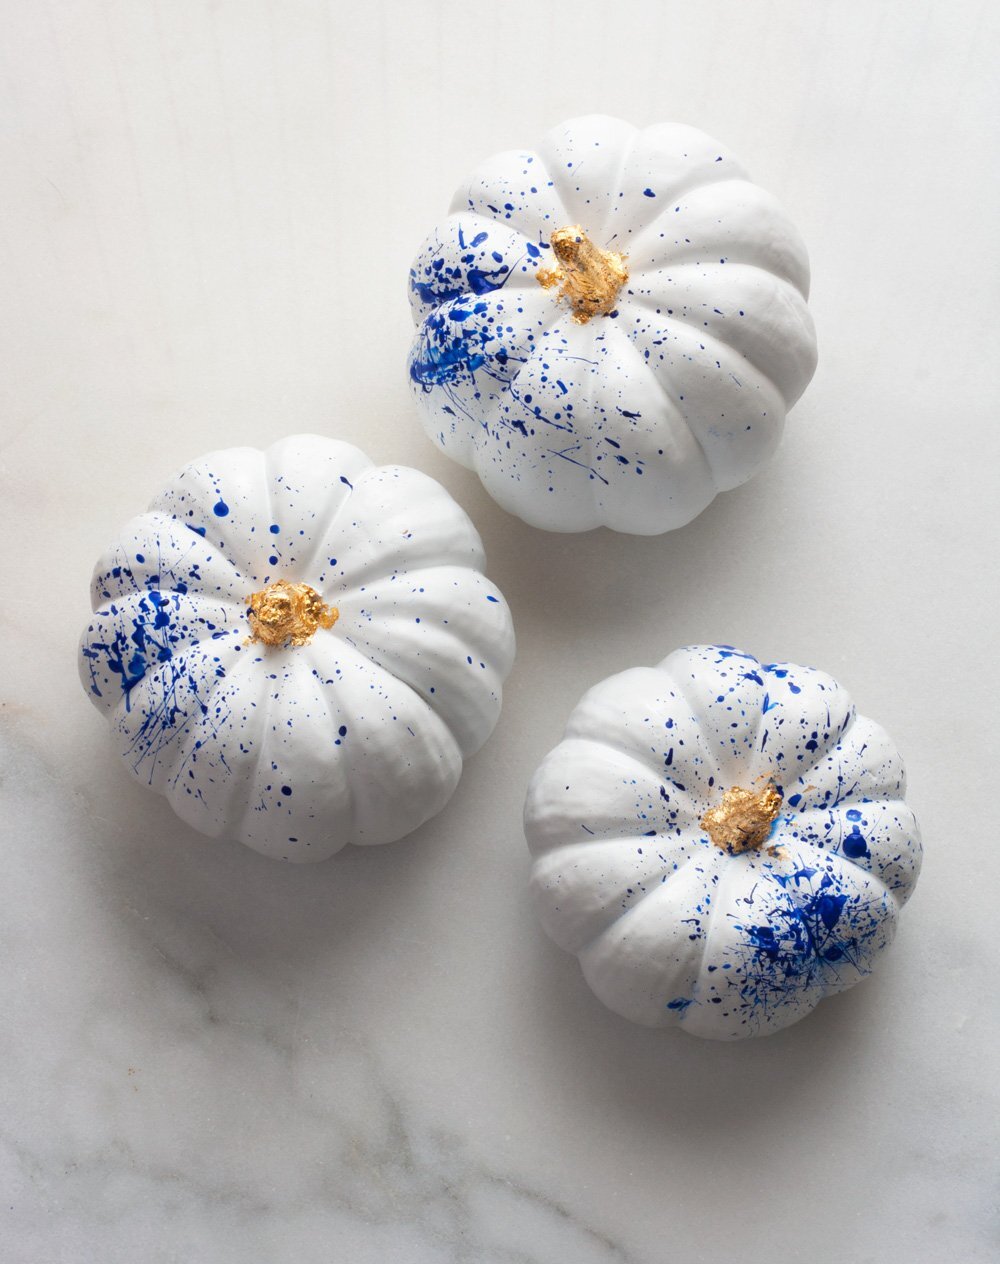
For a beautiful autumn dinner party with an unexpected color palette these chic little pumpkins would be right at home placed on a table with this cheeseboard, these salt and pepper cellars, and these bowls!
Enjoy!